QR Bill – What do I need to know?
It is exceptionally easy to create a QR bill with Atlanto. To ensure your optimal use of this innovative technology, we have compiled a short list of the most important steps to follow:
Step 1: Upload a payment slip for QR bills

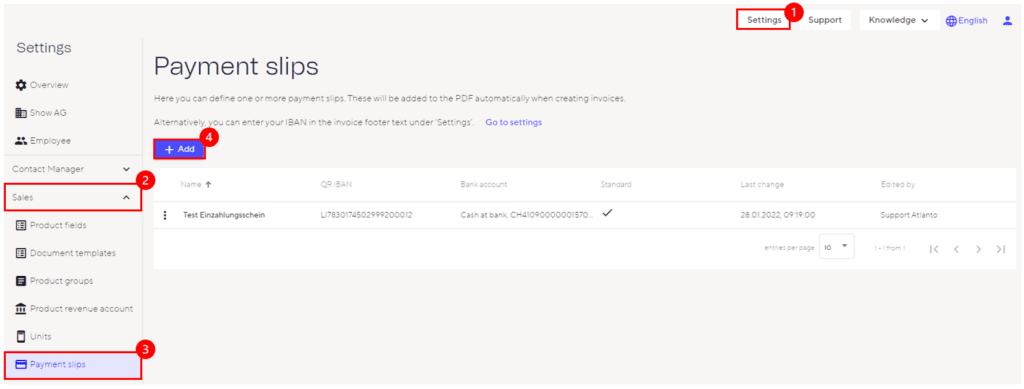
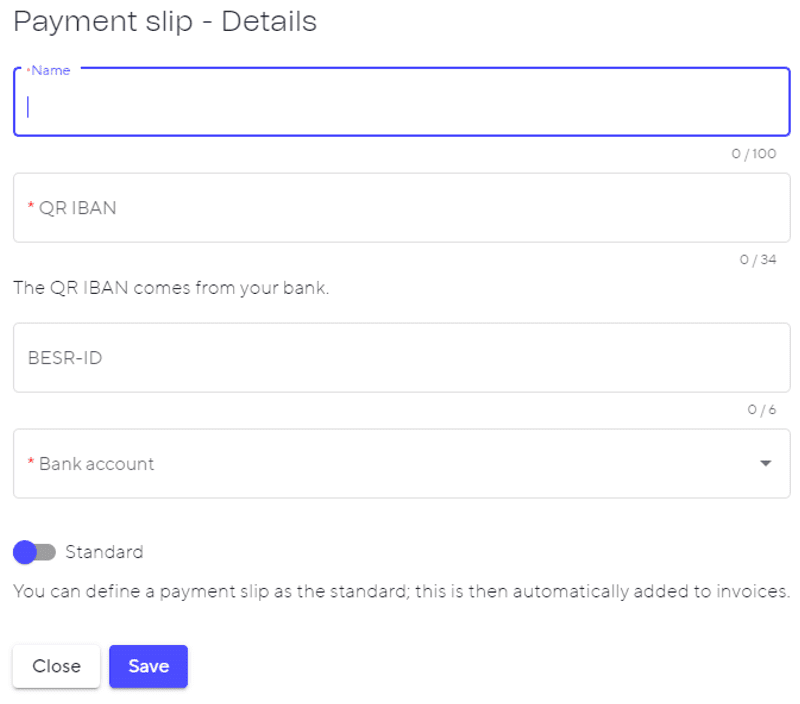
To create payment slips for your QR bills, go to Settings (upper right hand side). Under the module “Sales”. Click Add then insert all the necessary information here:

Name: Name your payment slip here (e.g. with the name of your bank)
QR-IBAN: A QR-IBAN is required for QR-bills, which is added in this input field. If you do not know your QR-IBAN, you can request it from your bank. You can often also find your QR-IBAN in e-banking under account information.
BESR-ID: The BESR ID can optionally be added here. If specified, the BESR ID can be integrated into the QR code to simplify payment processing. Your bank will also provide you with a BESR ID.
Bank account: Select your desired bank account here.
Step 2: Create invoice order & fill in invoice details

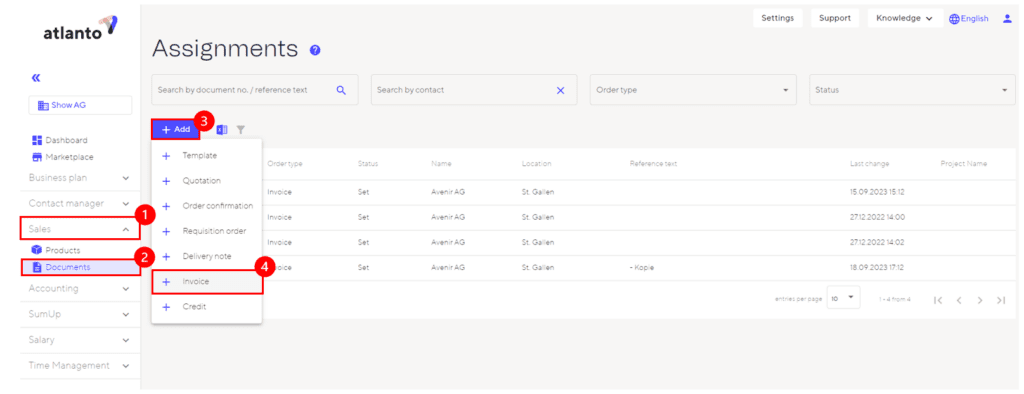
To create an invoice, first click on “Orders” in the Sales module. Now you can select “+ Invoice” using the Add button.
Now fill in all the details of your invoice. Make sure you select the correct payment slip from step 1 in the “Document” section of the order details.
Step 3: Change status to “Deferred”

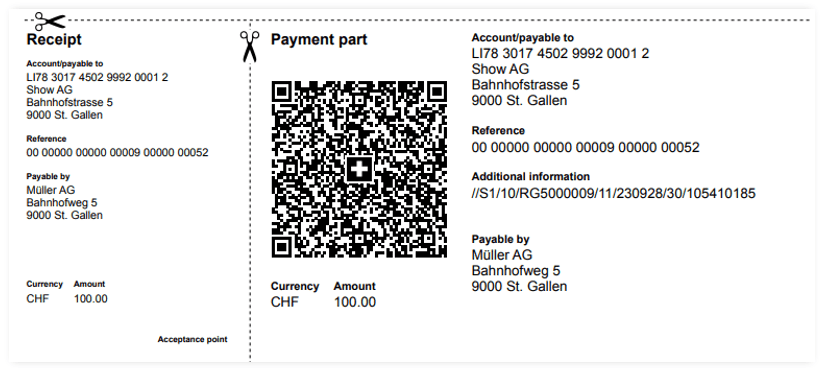
Um die finale QR-Rechnung zu generieren, klicke auf den Aktionen-Button und gehe auf “Dokument generieren” und wähle aus, ob die QR-Rechnung mit oder ohne Kopfdaten generiert werden soll. Anschliessend wird eine PDF-Datei mit deiner QR-Rechnung generiert, welche nun versandbereit ist.

Do you have any further questions about creating invoices? Then also read the FAQ – How do I create an invoice?

