How do I create an invoice?
This is a step-by-step guide to create invoices in Atlanto effortlessly and efficiently. Whether you want to create an invoice for the first time or want to improve your knowledge of the system, you will find the information you need here.
What information must be added in advance?
When setting up accounting, you will be guided through the path shown below in the wizard. Here you already have the option of entering a bank account and a payment slip.

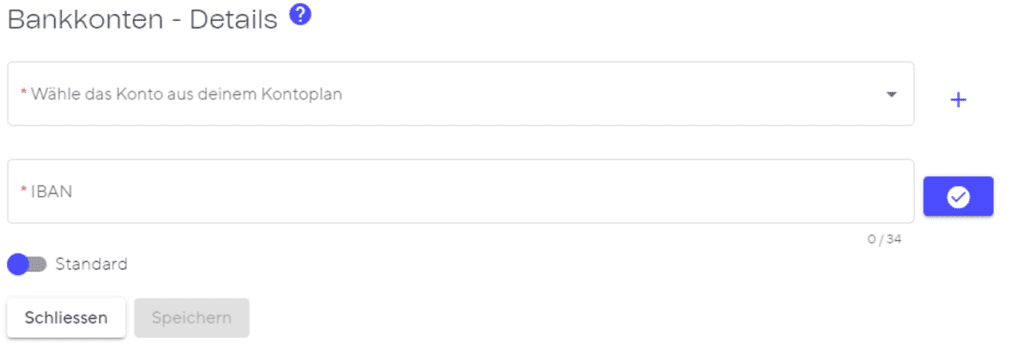
If you skipped these steps at the beginning, you can simply complete them later in the settings as follows:
Step 1: Deposit bank account
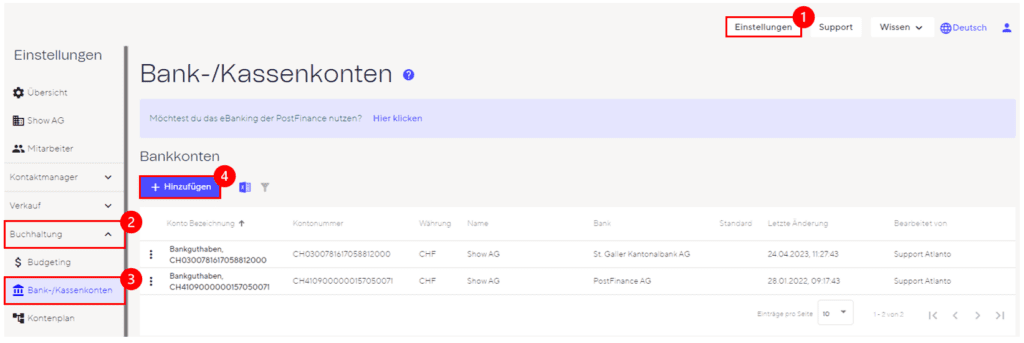
To add your bank account, go to the settings (top right in each case). In the Accounting module you will find “Bank/cash accounts”. Bank accounts can be entered here using the Add button:
Step 2: Enter payment slip

To enter payment slips for invoices, go to the settings. You will find “Payment slips” in the Sales module. The required information can be entered here using the Add button:

Name: Name your payment slip here (e.g. with the name of your bank)
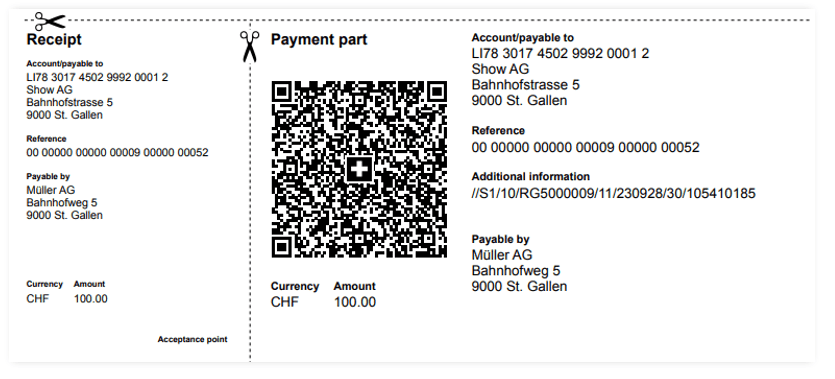
QR-IBAN: A QR-IBAN is required for QR-bills, which is added in this input field. If you do not know your QR-IBAN, you can request it from your bank. You can often also find your QR-IBAN in e-banking under account information.
BESR-ID: The BESR ID can optionally be added here. If specified, the BESR ID can be integrated into the QR code to simplify payment processing. Your bank will also provide you with a BESR ID.
Bank account: Select your desired bank account here, which was entered in step 1.
As soon as the first two steps have been completed, you can start with step 3 for each subsequent invoice.
Step 3: Create invoice

To create an invoice, first click on “Orders” in the Sales module. Now you can select “+ Invoice” using the Add button.
Step 4: Fill in basic information

The basic information is already filled in by default. Of course, these can be customised if desired. You also have the option of assigning a project to the invoice.
Step 5: Specify document details
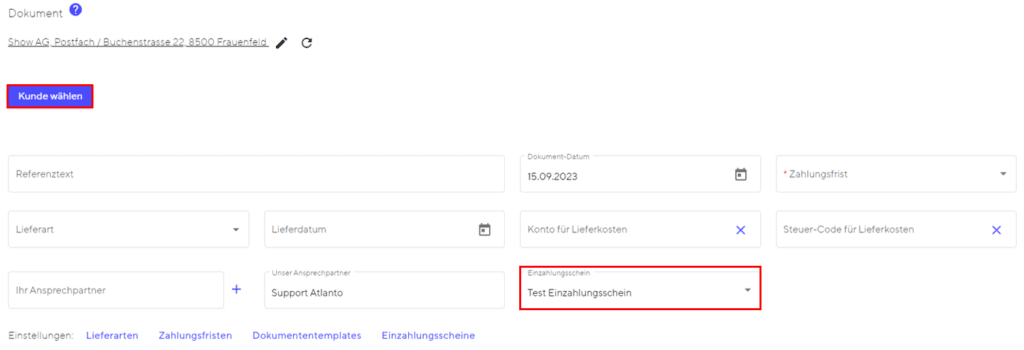
Now fill in all the details for the document and select the customer liable to pay using the “Select customer” button. In the “Payment slip” input field, you can now select the payment slip you entered in step 2.
Note: Recurring details regarding the delivery method and payment deadline as well as customer contact details can be entered directly for each contact in the “Contact manager” module. This means that the input fields are filled in automatically as soon as you select the corresponding contact.
Step 6 – Add items
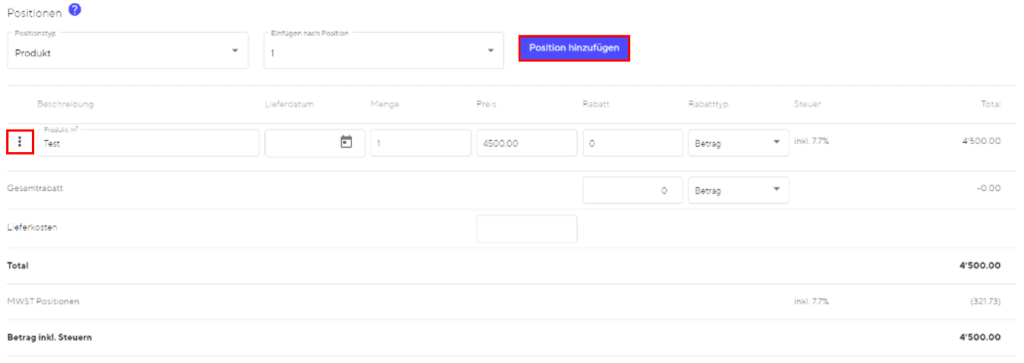
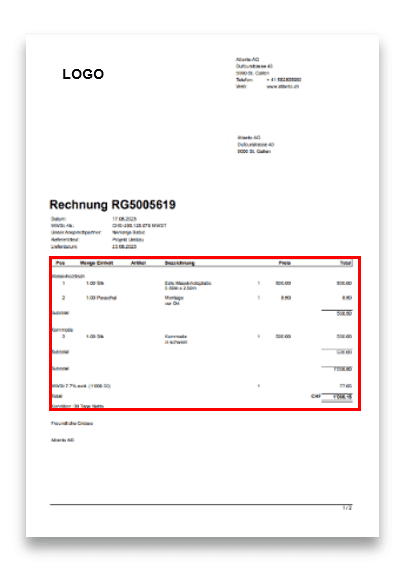

Specify the footer text of your document here. You can define this for each document type in the settings. However, you can adjust this manually at any time.
Step 8: Add files

In this step, you can add further files to your invoice. As soon as you have added a file, you can choose whether the document should be sent as an attachment when sending an e-mail.
Step 9: Change status to “Set“

Before you can generate an invoice with a QR code, the status must be changed from “Draft” to “Set” using the Actions button.
Note: As soon as you set the invoice to “Set”, a corresponding claim is automatically created. You can find these under Receivables and in your posting journal. If you set the invoice back to “Draft” status or even delete it, the posting is automatically deleted from your posting journal and your receivables.
Step 10: Generate invoice

To generate the final invoice, click on the Actions button and go to “Generate document” and select whether the invoice should be generated with or without header data. A PDF file with your invoice will then be generated, which is now ready for dispatch.
Do you have any questions? Back to the FAQ

